What is BitLocker?
BitLocker is a full disk encryption feature available in Windows operating systems. It provides enhanced security by encrypting the entire contents of a disk drive, including the operating system, system files, and user data. The encrypted data is protected and can only be accessed with the appropriate encryption key or password.
BitLocker Features and Benefits:
- Data Protection: BitLocker encrypts the data on a drive, protecting it from unauthorized access. Even if the drive is physically removed from the computer or accessed by an unauthorized user, the data remains encrypted and inaccessible without the encryption key.
- Transparent Operation: Once BitLocker is enabled, it operates transparently in the background, requiring minimal user intervention. Users can access their encrypted data as they normally would, and the encryption and decryption processes are handled automatically.
- Secure Boot: BitLocker integrates with the secure boot feature of Windows, ensuring that the computer starts only with trusted components and verifying the integrity of the boot process. This protects against attacks that attempt to bypass or tamper with the encryption.
- Multi-Factor Authentication: BitLocker supports additional authentication methods to enhance security. You can configure BitLocker to require a PIN, a USB device containing the encryption key, or both in addition to the user’s login password.
- Centralized Management: Organizations using enterprise editions of Windows can manage BitLocker centrally using tools like Active Directory Group Policy or Microsoft BitLocker Administration and Monitoring (MBAM). This allows administrators to enforce encryption policies, monitor compliance, and recover data if needed.
BitLocker is primarily designed to protect data on internal hard drives, but it can also be used to encrypt external drives, such as USB flash drives and external hard drives.
It’s important to note that BitLocker is available in specific editions of Windows, such as Windows 10 Pro, Enterprise, and Education, as well as Windows 8.1 Pro and Enterprise.
BitLocker Requirements:
To enable BitLocker, the full disk encryption features available in Windows operating systems, you need to meet the following requirements:
- Windows Edition: BitLocker is available in specific editions of Windows, such as Windows 10 Pro, Enterprise, and Education, as well as Windows 8.1 Pro and Enterprise. Ensure that you are using a compatible edition.
- Trusted Platform Module (TPM): BitLocker relies on a TPM, which is a hardware component integrated into many modern computers. The TPM provides hardware-based security features, including secure storage of encryption keys. Verify that your computer has a TPM version 1.2 or later. You can check this in the computer’s BIOS or UEFI settings. If your computer does not have a TPM, you can still use BitLocker, but you’ll need to change the BitLocker settings to allow it without a TPM. This alternative method requires additional steps and a USB flash drive to store the encryption key.
- Compatible File System: BitLocker requires the use of NTFS (New Technology File System) as the file system on the drive you want to encrypt. If your drive is formatted with FAT32 or exFAT, you must convert it to NTFS before enabling BitLocker.
- Sufficient Disk Space: Ensure that you have enough free space on the drive to accommodate the BitLocker encryption. BitLocker encrypts the entire drive, so you’ll need enough space to store the encrypted data.
- Administrative Privileges: You must have administrative privileges on your computer to enable BitLocker. This requirement ensures that only authorized users can help and manage encryption.
Note: The specific steps to enable BitLocker may vary depending on the version of Windows you are using. It is recommended to refer to Microsoft’s documentation or support resources for detailed instructions corresponding to your operating system version.
How to enable BitLocker in Windows 10/11?
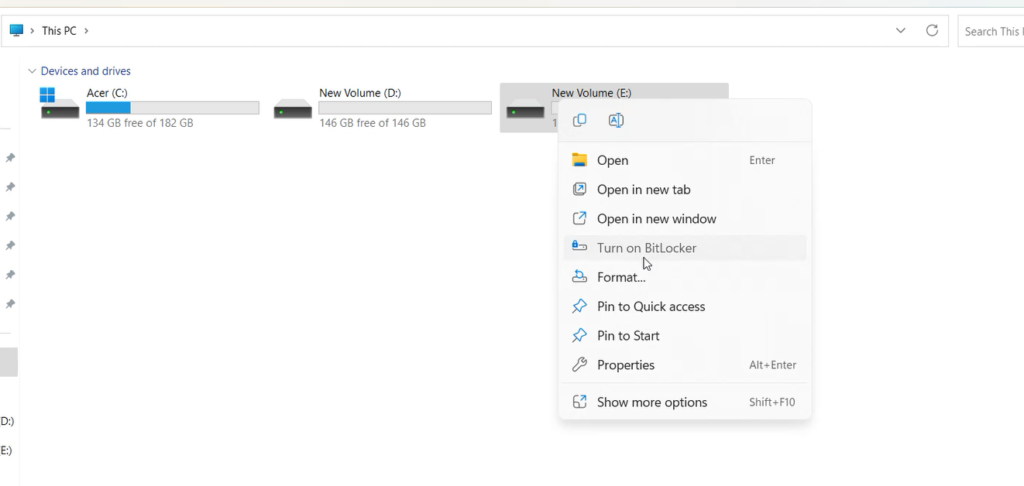
To enable BitLocker Open File Manager then Right click on drive
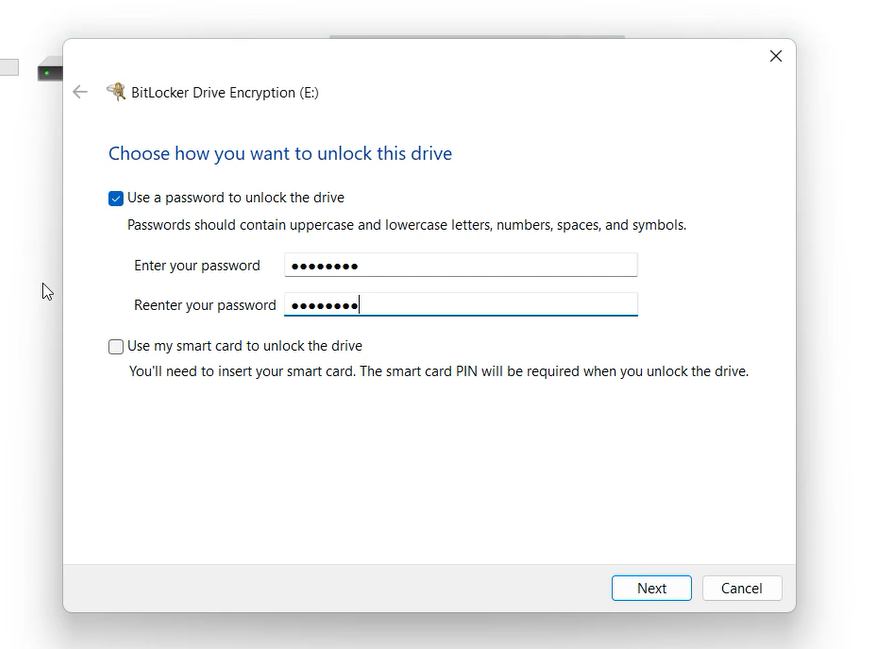
Now select Use a password to unlock the drive and click on Next.
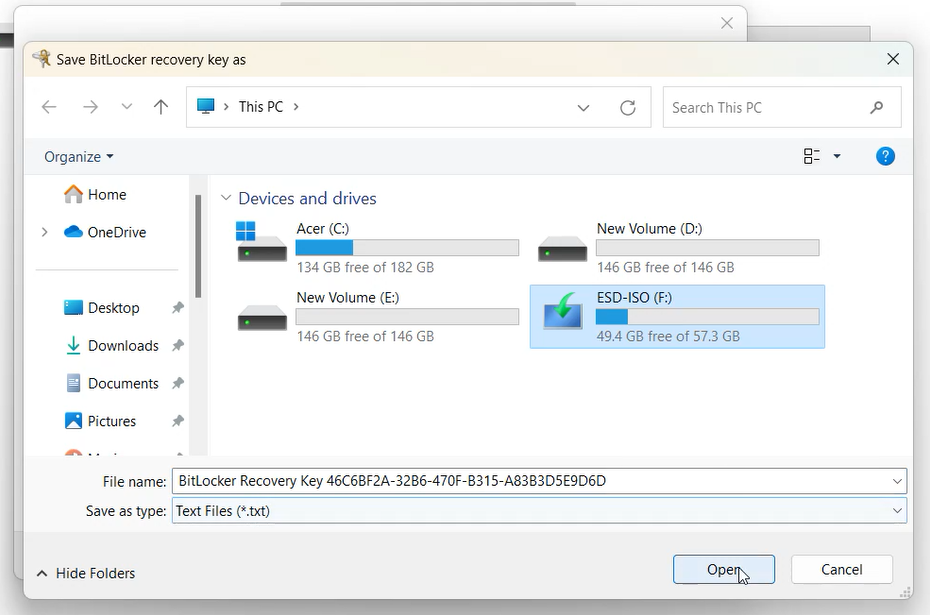
Now save a BitLocker recovery key (It helps to recover BitLocker when you forget your password)
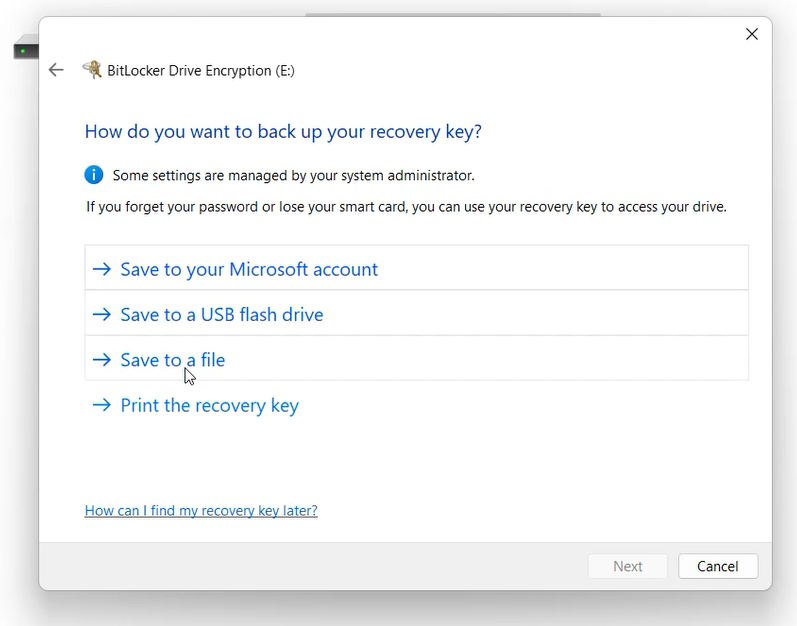
Here I have chosen pendrive to store the BitLocker password.
Note: In the Latest versions of Windows we are unable to store the recovery key in the same drive. The reason why you can’t store the BitLocker recovery key on the same disk is that if the disk fails or becomes corrupted, you won’t be able to access the recovery key. It’s recommended to store the recovery key on a different device or print it out and keep it in a safe place.
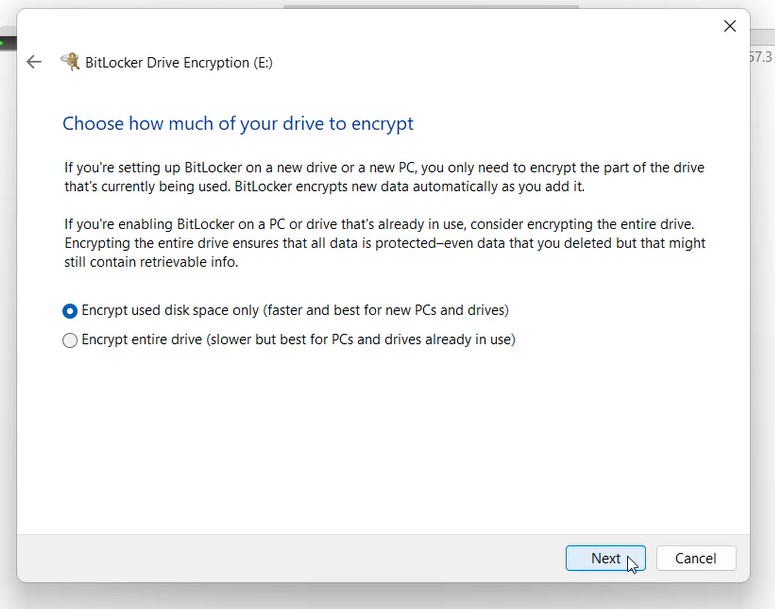
Now select any one option. I will prefer Select Encrypt to use disk space only. which completes the process very fast.
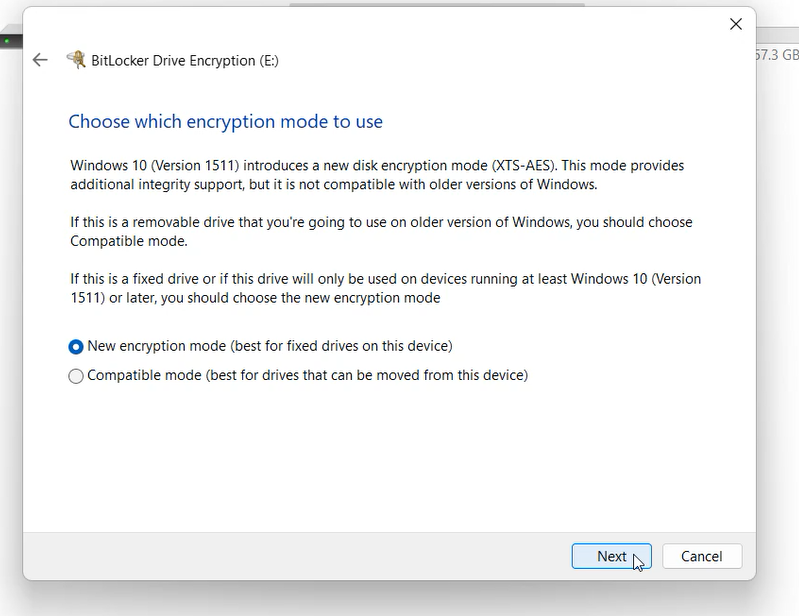
If it was a fixed drive choose New encryption mode and if it was a removable disk choose the compatible mode.
Click on next. That’s it.
Now your drive has BitLocker encrypted.
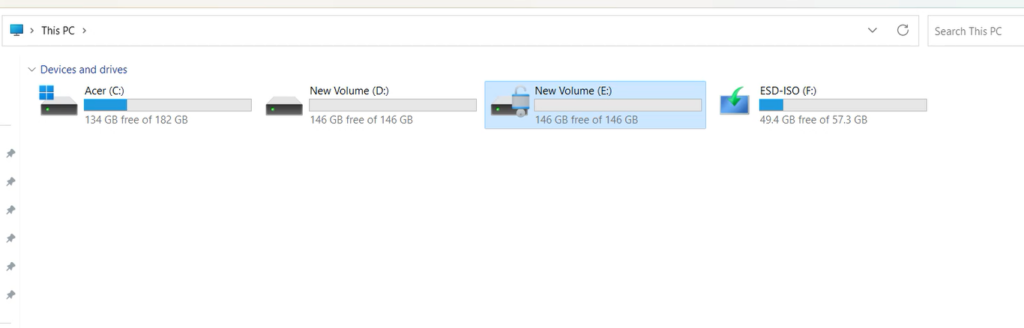
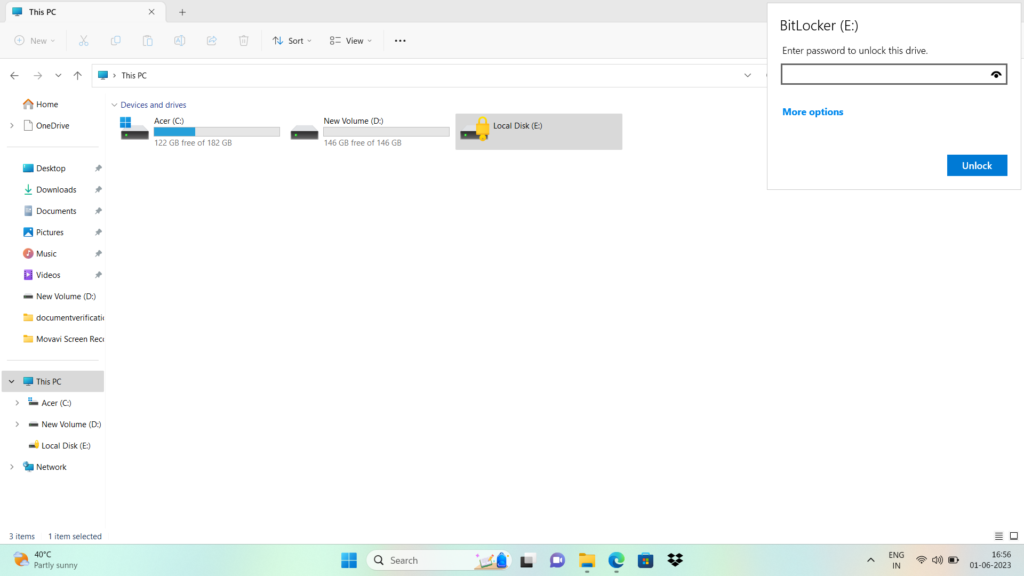
If you restarted your PC BitLocker encrypted drive will be locked. you can unlock BitLocker drive using the password or BitLocker Recovery key. Once it was unlocked it does not lock automatically until you restart the system.
Also Read: How to Regenerate Lost BitLocker Recovery Key
Thank you for reading! If any information is outdated or unclear, kindly inform us. Your feedback is important for maintaining the quality of our content. Stay connected for the latest updates and tutorials. We appreciate your support and look forward to serving you better.